Affiliate Disclosure: This page may contain affiliate links. If you buy through these links, PrintPilotLab may earn a small commission at no extra cost to you.
Settings Guide
How to Dry Filament: Temperature Settings for PLA, PETG, TPU, Nylon, and More
A practical drying chart plus real-world examples for fixing stringing, popping, weak layers, and rough surface finish caused by wet filament.
Quick Answer
Dry filament by material, not by guesswork. Start around 45–50°C for PLA, 60–65°C for PETG, 50–55°C for TPU, and 70–90°C for nylon or PC. If a print suddenly has stringing, popping, rough surfaces, or weak layers, drying the spool is often faster than changing slicer settings blindly.
Wet filament is one of the most common beginner problems because it looks like several other problems at once. It can mimic bad retraction, poor temperature settings, low-quality filament, partial clogs, and weak cooling. That makes filament drying a high-value troubleshooting topic: it answers a real user pain point and naturally leads to dryer boxes, desiccant, storage bags, and better filament recommendations.
Important safety note
Always check the filament manufacturer’s recommendation when available. Do not use a kitchen oven unless you have verified stable low-temperature control with a separate thermometer. Many ovens overshoot enough to soften filament or warp plastic spools.
| Material | Drying Temp | Typical Time | Why It Matters |
|---|---|---|---|
| PLA | 45–50°C | 4–6 hours | Best first fix for unexplained stringing, brittle PLA, or rough walls. |
| PETG | 60–65°C | 4–8 hours | PETG absorbs moisture enough to create stringing, blobs, and weak glossy surfaces. |
| TPU | 50–55°C | 4–8 hours | Flexible filament is moisture-sensitive and often prints best directly from a dry box. |
| ABS / ASA | 70–80°C | 4–6 hours | Moisture can make layer lines rough and reduce consistency, especially on larger parts. |
| Nylon | 70–90°C | 8–12+ hours | Nylon can print terribly after sitting out; drying is often mandatory, not optional. |
| PC | 80–90°C | 6–10 hours | High-temp filament needs high-temp drying and sealed storage. |
| PVA / support | 45–55°C | 4–8 hours | PVA degrades quickly when wet and should live in dry storage. |
01
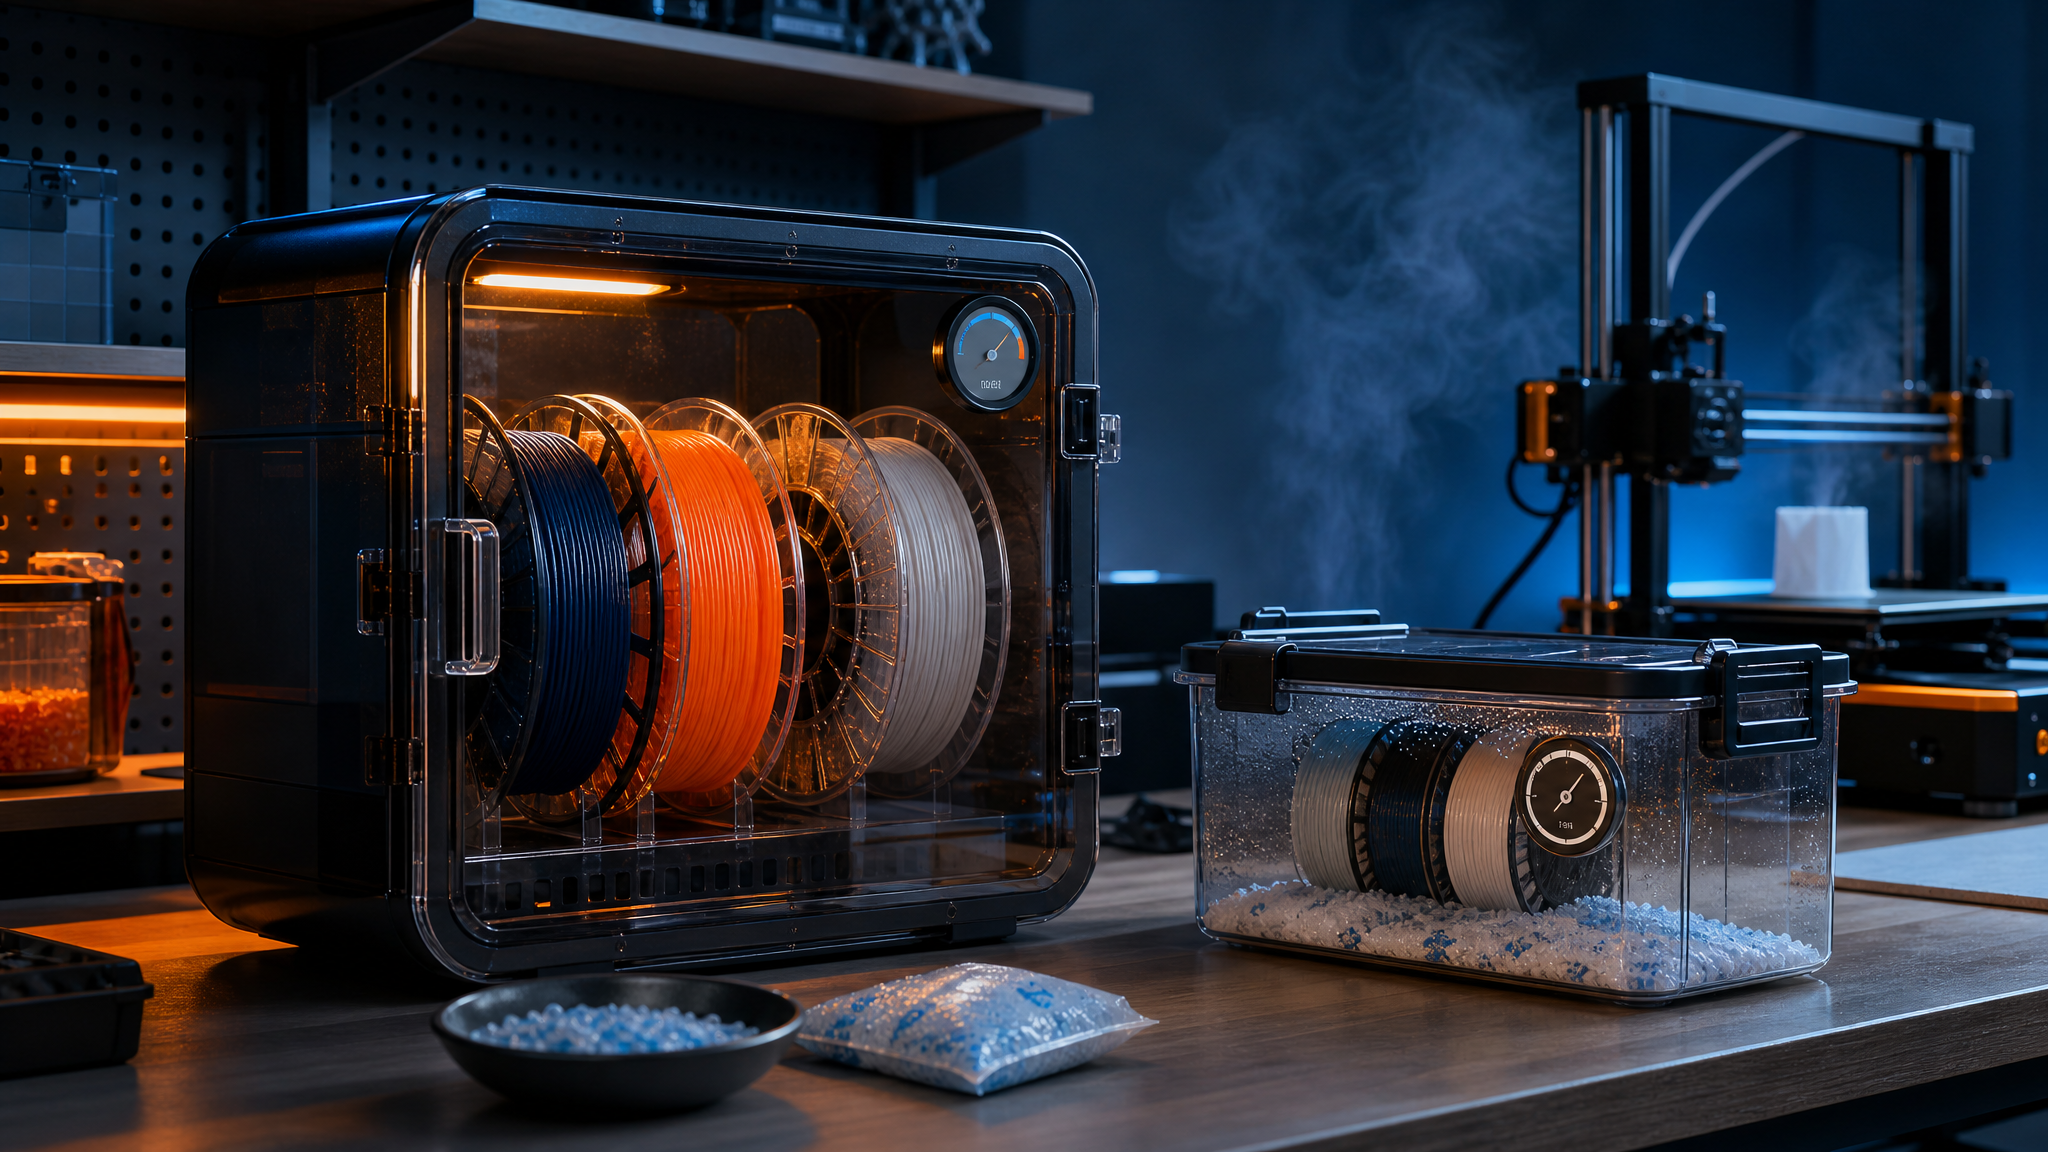
Use a Controlled Dryer, Not a Guessing Game
Why it matters: Filament drying only works if the temperature is controlled. Too cool and the spool stays wet. Too hot and the filament can soften, ovalize, fuse to itself, or warp the spool. A purpose-built dryer is easier for beginners because it holds a target temperature and often lets you print while drying.
Real-world example: A roll of PETG that strings across every travel move may look like a retraction problem. If you raise retraction too far, you can create clogs or under-extrusion. Drying PETG first removes moisture as a variable before you start changing slicer settings.
SUNLU Filament Dryer
Popular entry-level dryer box for PLA, PETG, and TPU workflows.
Polymaker PolyDryer
Modular dry-storage style system for users with multiple spools.
EIBOS Filament Dryer
Good option for users drying larger or multiple spools.
02
Drying PLA
Starting point: 45–50°C for 4–6 hours.
Why it matters: PLA is less moisture-sensitive than nylon or TPU, so beginners often assume it never needs drying. But PLA can still absorb enough moisture to cause stringing, brittle filament, rough top surfaces, or inconsistent extrusion. This is especially common with old spools, cardboard spools stored in humid rooms, or filament left out for months.
Real-world example: If a PLA Benchy suddenly has wispy strings between the cabin posts after printing cleanly last month, dry the spool before changing five slicer settings. If the same G-code improves after drying, the slicer was not the main issue.
Good follow-up purchases: Shop PLA → Shop Desiccant →
03
Drying PETG
Starting point: 60–65°C for 4–8 hours.
Why it matters: PETG is popular for functional parts because it is tougher and more heat-resistant than PLA, but wet PETG can be frustrating. Moisture increases stringing, creates blobs, makes surfaces look rough or bubbly, and can reduce part strength.
Real-world example: A PETG storage bracket may look acceptable but break at layer lines if the filament is wet. Drying the spool can improve extrusion consistency and layer bonding before you blame the printer or switch brands.
When to dry: Dry PETG before important functional prints, long overnight jobs, or anything where clean surfaces and reliable layer adhesion matter.
04
Drying TPU
Starting point: 50–55°C for 4–8 hours.
Why it matters: TPU is flexible and useful, but it is also a moisture magnet. Wet TPU can pop, ooze, string heavily, and produce rough surfaces. Because TPU already prints slower and is harder to feed cleanly, moisture makes troubleshooting much worse.
Real-world example: If a flexible phone case has hairy strings inside every opening, drying the TPU may improve the print more than aggressive retraction changes. Too much retraction on TPU can cause jams, especially with Bowden printers.
Best practice: For TPU, print directly from a dryer or dry box when possible.
TPU Filament
Flexible filament for cases, feet, gaskets, and grips.
Filament Dry Box With Hygrometer
Helpful for printing moisture-sensitive materials while keeping them dry.
05
Drying ABS and ASA
Starting point: 70–80°C for 4–6 hours.
Why it matters: ABS and ASA are often printed for stronger, more heat-resistant parts. Moisture can create inconsistent extrusion, rough walls, and weaker parts. Because these materials already require enclosure and temperature control, wet filament adds another failure source.
Real-world example: An ASA outdoor camera mount that prints with rough, pitted walls may be suffering from moisture, not just enclosure temperature. Drying the spool can improve surface consistency before you tune chamber heat or fan settings.
Safety note: ABS/ASA printing needs ventilation. Drying is not a substitute for safe printing practices.
06
Drying Nylon
Starting point: 70–90°C for 8–12+ hours.
Why it matters: Nylon is one of the clearest examples of why filament drying matters. It can absorb moisture quickly and print with popping, steam, rough surfaces, weak layers, and poor dimensional consistency. For nylon, drying is not a “maybe” step — it is usually part of the workflow.
Real-world example: A nylon gear or hinge may fail early if printed wet because moisture can compromise layer bonding. Drying the spool and printing from a dry box can be the difference between a usable functional part and a stringy, weak mess.
Best practice: Dry nylon thoroughly, then print from a heated dryer or sealed dry box. Do not leave it out overnight and expect the next print to behave the same.
Nylon Filament
For advanced functional parts after your drying/storage workflow is ready.
Vacuum Filament Storage Bags
Useful for keeping dried nylon and TPU from reabsorbing moisture.
07
Drying PC and High-Temp Materials
Starting point: 80–90°C for 6–10 hours, depending on the filament brand.
Why it matters: Polycarbonate and other high-temp materials are used when strength and heat resistance matter. They are also less forgiving. If the filament is wet, you may see bubbles, poor surfaces, weak layers, and failed functional parts despite using an expensive material.
Real-world example: If a PC bracket is intended for a warm enclosure or car interior, weak layer adhesion from moisture defeats the point of using PC in the first place. Drying and storage are part of the cost of printing engineering materials.
Beginner warning: Do not buy PC until your printer can handle high nozzle temperatures, bed temperatures, enclosure needs, and high-temp drying.
08
Drying PVA and Support Filament
Starting point: 45–55°C for 4–8 hours.
Why it matters: PVA is water-soluble, which is useful for supports, but that also means it is extremely sensitive to humidity. Wet PVA can become soft, bubbly, inconsistent, and difficult to feed.
Real-world example: If soluble supports fail halfway through a multi-material print, the main model may be ruined too. Keeping PVA dry protects both the support material and the expensive print it is supporting.
Best practice: Store PVA sealed with desiccant and only expose it when needed.
09
How to Tell If Filament Is Wet
Why it matters: Moisture symptoms often get misdiagnosed. Beginners may waste hours changing retraction, speed, temperature, flow, and cooling when the spool simply needs drying.
- Popping or sizzling: moisture flashing into steam at the nozzle.
- Hairy stringing: common with wet PETG, TPU, and old PLA.
- Rough or foamy walls: moisture disrupting smooth extrusion.
- Weak layers: especially concerning for PETG, nylon, PC, ABS, and ASA.
- Inconsistent extrusion: the printer sounds and looks like it cannot maintain a stable flow.
Simple test: Dry the spool, reprint the same small model with the same G-code, and compare results. If it improves, moisture was part of the problem.
10
Store It Correctly After Drying
Why it matters: Drying is temporary if the spool goes right back onto an open shelf in a humid room. Filament starts reabsorbing moisture as soon as it is exposed. Storage matters most for PETG, TPU, nylon, PC, and PVA, but even PLA benefits from sealed storage.
Real-world example: A spool of TPU may print well immediately after drying, then string badly again after sitting out for a week. That does not mean the dryer failed; it means the storage workflow failed.
Rechargeable Silica Gel Desiccant
Low-cost way to keep sealed bins and bags dry.
Vacuum Filament Storage Bags
Helpful for storing multiple opened spools.
Dry Box Hygrometers
Lets you see whether your storage bin is actually staying dry.
11
Drying Settings Are Starting Points, Not Laws
Why it matters: Filament brands use different blends, pigments, spool materials, and additives. A safe drying temperature for one PLA may be too warm for another spool, especially if the spool itself is plastic or the filament has a low glass-transition blend.
Real-world example: Matte PLA, silk PLA, PLA+, and recycled PLA may behave differently in the dryer. If a spool label gives a lower recommendation than a generic chart, follow the spool.
Beginner rule: Start conservative, dry longer rather than hotter, and keep notes for each material brand.
PrintPilotLab Bottom Line
If a print suddenly gets stringy, rough, weak, or poppy, dry the filament before overhauling your slicer profile. A dryer box, sealed storage, desiccant, and a simple reprint test can save hours of troubleshooting and a lot of wasted filament.